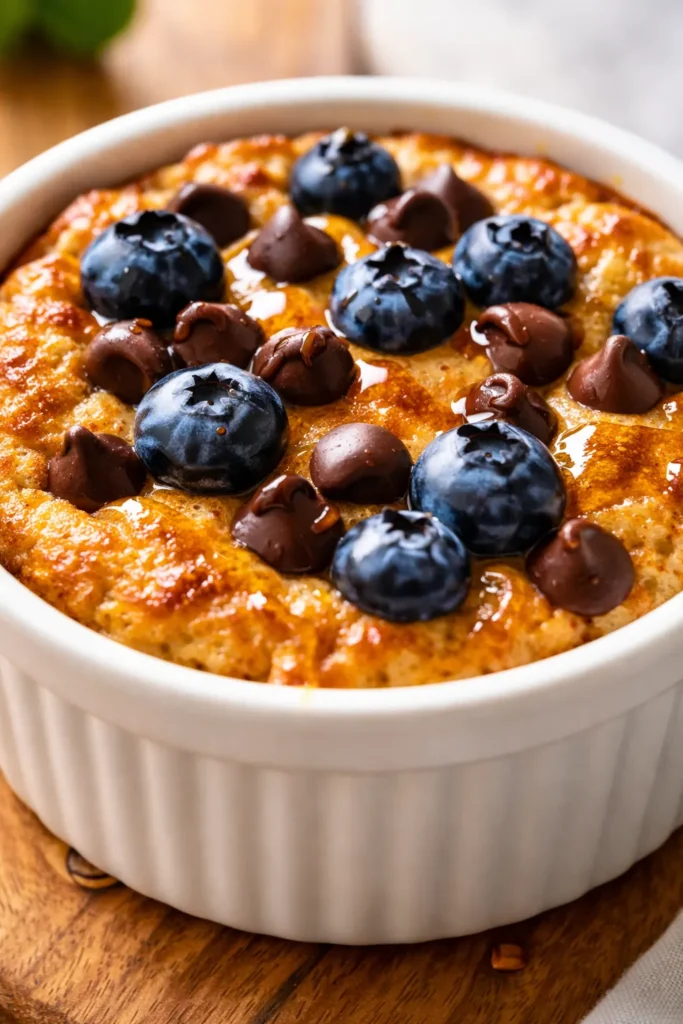
The first time I pulled one of these out of the oven, my nine-year-old literally asked if it was cake. That golden, puffed top, the steam rising when I poked it with a fork — it looked that good. And honestly? It tastes even better. These baked protein pancake bowls have become our Saturday morning staple, and I’m not mad about it at all.
The short version: Fifteen minutes of hands-on work, twenty minutes in the oven, and you get a warm, fluffy, high-protein breakfast that feels like a treat.
I’ve been making these for about six months now, tweaking the blend ratio until my whole family stopped asking for the stovetop version. The cottage cheese is the secret — it adds protein and makes the texture incredibly creamy without any weird aftertaste.
- Serves: 1 as a main breakfast
- Hands-On Time: 5 min | Total Time: 30 min
- Difficulty: Easy — even a sleepy Saturday morning can handle this
- Cost per serving: ~$1.75
- Calories: ~380 per serving
- Dietary Notes: High protein, can be gluten-free (use oat flour)
(Photo above: A single ramekin of baked protein pancake bowl, golden and slightly puffed, sitting on a rustic wooden board with a small pitcher of maple syrup beside it. Natural light from a kitchen window hits the top, showing the slight crackle of the baked surface.)
The Thing That Makes These Actually Taste Like Pancakes (Without the Stovetop Hassle)
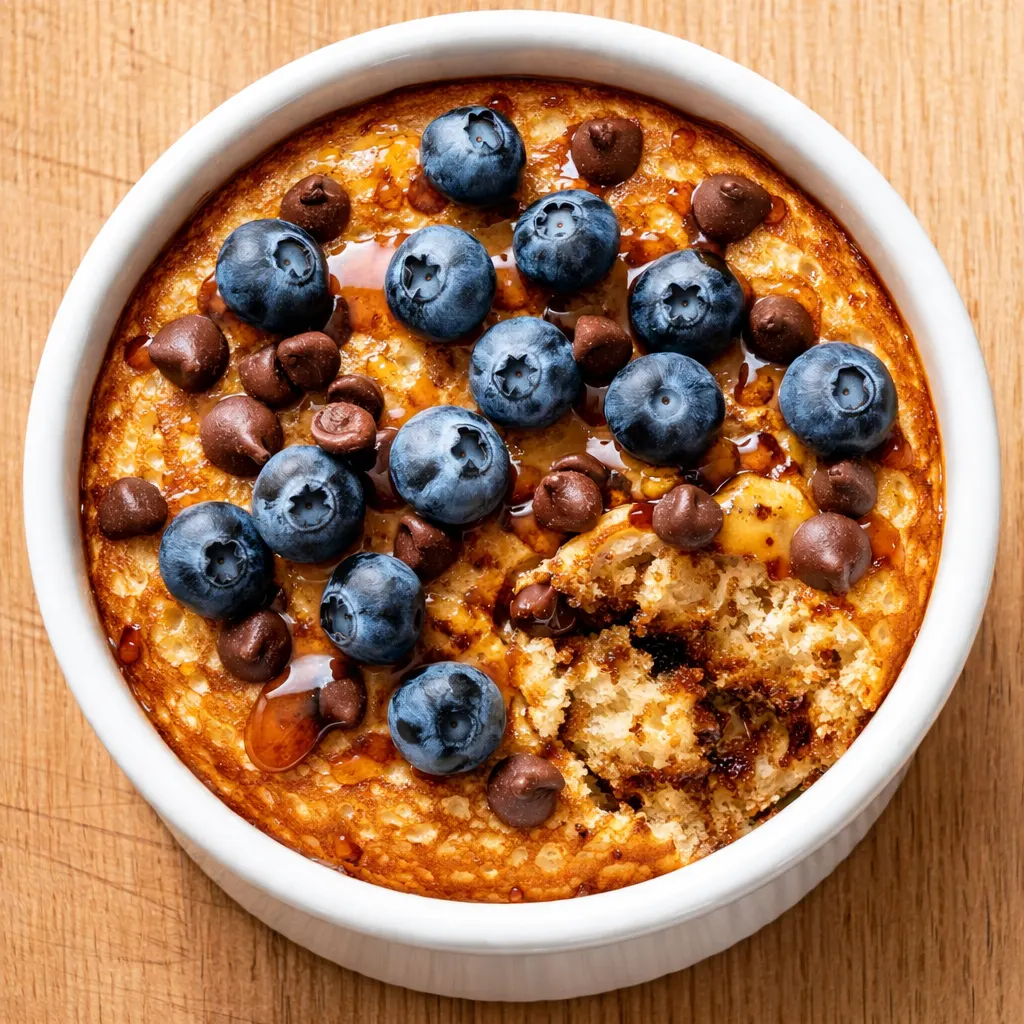
The trick is the blender. You throw everything in — cottage cheese, oats, egg, maple syrup, vanilla — and blitz it until it’s perfectly smooth. That step does two things: it breaks down the oats so the texture is tender instead of chewy, and it makes the cottage cheese disappear into the batter. No one will ever guess there’s cottage cheese in here. I promise.
The second thing is the baking dish. A small, well-greased ramekin gives you that puffy, golden dome. If you use something too big, it spreads thin and bakes flat. Stick with a dish that holds about 1 to 1.5 cups and you’ll get the perfect rise.
What you end up with is a warm, fluffy, slightly sweet bowl that you can top however you want — syrup, nut butter, fruit, a dusting of powdered sugar. It’s like having a personal pancake that baked itself while you made coffee.
Everything You Need (And a Few Notes From Me)
- 1/2 cup quick oats or oat flour: Oats are the backbone here. Quick oats blend smoother, but rolled oats work too — just let the blender run a few extra seconds. My kids actually prefer the oat version over regular pancakes now. I’m not sure how to feel about that.
- 1/2 tsp baking powder + 1/4 tsp baking soda: This combo gives you that nice rise. If you only have baking powder, use 3/4 tsp total and skip the soda.
- 1 egg: The binder. It helps everything puff and set. I’ve tested this with a flax egg and it works, but the texture is a bit less fluffy.
- 1/2 cup cottage cheese: The protein powerhouse. Use full-fat for the creamiest texture. Small-curd blends smoother. I know it sounds weird, but trust me — you won’t taste it at all.
- 1–2 tbsp maple syrup: For sweetness. I use 2 tbsp because we like it on the sweeter side, but 1 is fine if you plan to add sweet toppings.
- 1 tsp vanilla extract: It rounds everything out and makes it taste like real pancakes.
- 1–2 tbsp milk of choice: Just enough to thin the batter to a pourable consistency. I use whole milk, but oat or almond work fine.
- Optional: berries, chocolate chips, or nuts: Fold these in after blending. My kids go for chocolate chips. I usually do blueberries on top so they don’t sink to the bottom.
What to Pull Out Before You Start
- Oven — preheat to 350°F
- Blender — any kind works, even a personal smoothie blender
- Small oven-safe baking dish, bowl, or ramekin (about 1 to 1.5 cup capacity)
- Toothpick for testing doneness
- Optional: a small spatula for getting every last drop of batter into the dish
Let’s Make It (Step by Step)
This goes fast, so read through once before you start. The whole hands-on part takes about five minutes.
Preheat and prep: Set your oven to 350°F. Lightly grease your ramekin or baking dish with butter or a spritz of oil.
- Blend: Add the oats, baking powder, baking soda, egg, cottage cheese, maple syrup, vanilla, and milk to your blender. Blitz on high until completely smooth — about 20 to 30 seconds. The batter should look like a thin pancake batter. (📸 Photo tip: The blended batter should be smooth and pourable, with no visible oat flakes or cottage cheese curds.)
- Fold: If you’re using berries, chocolate chips, or nuts, gently fold them into the batter now. Don’t overmix — just a few turns to distribute them.
- Pour: Pour the batter into your greased dish. It should fill it about two-thirds to three-quarters of the way. (📸 Photo tip: The batter should come close to the top but not touch the rim — leave room for the rise.)
- Bake: Place the dish in the oven and bake for 20 to 25 minutes. Start checking at 20 minutes — you want it golden brown on top and a toothpick inserted in the center should come out clean or with just a few moist crumbs.
- Broil (optional): For a crispier top, switch to broil for the last 1 to 2 minutes. Keep your eye on it — broil goes fast and can burn things in seconds. This is the step that makes it look like a bakery item, not gonna lie.
- Top and serve: Let it cool for about a minute (the ramekin will be hot). Add your favorite toppings — syrup, nut butter, fruit, yogurt, a sprinkle of cinnamon — and eat it warm with a spoon.
How I Meal Prep These for the Week
I make a double batch on Sundays and we’re set through Wednesday. The secret is to blend everything but the mix-ins, then store the batter in an airtight jar in the fridge. When I want one, I stir in the add-ins, pour into a greased ramekin, and bake. Fresh and warm with no morning mess.
- Fridge: Store baked bowls in a covered container for up to 4 days. Reheat in the oven at 350°F for 5–7 minutes, or microwave for 45 seconds (the microwave makes it softer, which my youngest actually prefers).
- Freezer: Yes! Wrap cooled baked bowls individually in plastic wrap, then pop them in a freezer bag. They keep for up to 2 months. Thaw overnight in the fridge or reheat straight from frozen in the oven.
- Reheat: Oven is best for keeping that golden top. Microwave works in a pinch but the texture is more like a soft cake. Both are delicious, just different.
Things I Wish I’d Known the First Time
- Don’t overfill the dish: The batter rises, so leave about a half-inch of room at the top. I learned this the hard way when my first one bubbled over and made a mess on the oven rack. Still tasted good, though.
- Let the blender run long enough: If you stop too soon, you’ll get oat chunks and cottage cheese lumps. The batter should be as smooth as a pancake batter. Give it a full 30 seconds.
- Taste the batter before you pour: I know it sounds weird, but dip a clean finger in and taste it. Is it sweet enough? Does it need a pinch of salt? You can adjust before it bakes. My husband thought I was crazy until I let him taste a batch that was missing the vanilla — big difference.
- Toothpick test is your friend: The top might look golden and done, but the center can still be wet. Stick a toothpick in the middle at 20 minutes. If it’s gooey, give it 3 more minutes and check again. Even if you overbake it by a minute or two, it’ll still taste great — just a bit denser.
Swaps That Actually Work
- Gluten-free: Use certified gluten-free oat flour or quick oats. Works beautifully — we do this for my gluten-sensitive nephew and he asks for seconds.
- Dairy-free: Swap the cottage cheese for a dairy-free alternative (there are a few good ones now) and use plant milk. The texture will be slightly less thick but still delicious. I’ve done this for a friend’s kid and it held up well.
- Kid-friendly (extra sweet): Use the full 2 tbsp maple syrup and fold in chocolate chips. My kids call these “breakfast cupcakes” and I’m honestly okay with that.
- Adult version (less sweet): Use 1 tbsp maple syrup and top with a dollop of plain Greek yogurt and fresh berries. The tartness of the yogurt balances everything.
- Higher protein: Add 1 scoop of unflavored or vanilla protein powder. Reduce the oat flour slightly if the batter gets too thick. I’ve done this on heavy workout mornings and it keeps me full until lunch.
- No blender? Use oat flour and whisk everything by hand. The texture will be a bit more rustic (think baked oatmeal vibes) but it still works.
Questions I Get About This Recipe All the Time
Q: Why did my bowl come out dense instead of fluffy?
A: Ugh, I’ve been there. Most likely your baking powder or baking soda is old. Check the dates — they lose potency after about 6 months. Also, make sure you’re using a small enough dish. If the batter is too thin in a wide dish, it won’t puff properly. Try a ramekin or small baking cup next time.
Q: Can I make this without cottage cheese? I don’t have any on hand.
A: You can swap it for plain Greek yogurt or even silken tofu. The texture will be a little less creamy and the protein count drops, but it still works. I’ve tested it with Greek yogurt and it was good — just not quite as fluffy. Add an extra tablespoon of milk if the batter seems too thick.
Q: How long do these last? Can I freeze them?
A: Baked bowls stay good in the fridge for 4 to 5 days in a sealed container. They freeze beautifully for up to 2 months — wrap each one individually so you can grab one at a time. To reheat from frozen, bake at 350°F for about 10 to 12 minutes, or microwave for 45 seconds. The microwave makes them softer, the oven keeps the top crispier.
Q: What do you serve with these?
A: Honestly, they’re pretty filling on their own with a protein punch. But my family loves them with a side of turkey sausage or bacon when we’re doing a big Saturday breakfast. For a lighter meal, I’ll add a side of fresh fruit or a simple green smoothie. My kids like theirs plain with just a drizzle of syrup, but I’m a “nut butter on top” person all the way.
More Recipes My Family Makes on Repeat
If you loved this one, here are a couple of others that get the same reaction at our table:
- [INTERNAL LINK PLACEHOLDER: Single-Serving Baked Oatmeal] — The stovetop version of this vibe, ready in 10 minutes flat
- [INTERNAL LINK PLACEHOLDER: Cottage Cheese Pancakes] — The classic stovetop version that started my cottage cheese obsession
- [INTERNAL LINK PLACEHOLDER: High-Protein Breakfast Muffins] — Make a dozen on Sunday and grab them all week
These are all from my [INTERNAL LINK PLACEHOLDER: quick breakfasts collection] — everything under 30 minutes and approved by picky eaters.
These baked protein pancake bowls are my current favorite way to start a weekend morning — or a busy weekday when I want something warm without standing at the stove. The blender does almost all the work, and the oven takes care of the rest. If you try them, drop a comment below and let me know how they turned out — I love hearing what toppings your family chooses!
📌 Save this baked protein pancake bowl recipe for your next lazy weekend breakfast — creamy, fluffy, and ready in 30 minutes with zero stovetop mess.