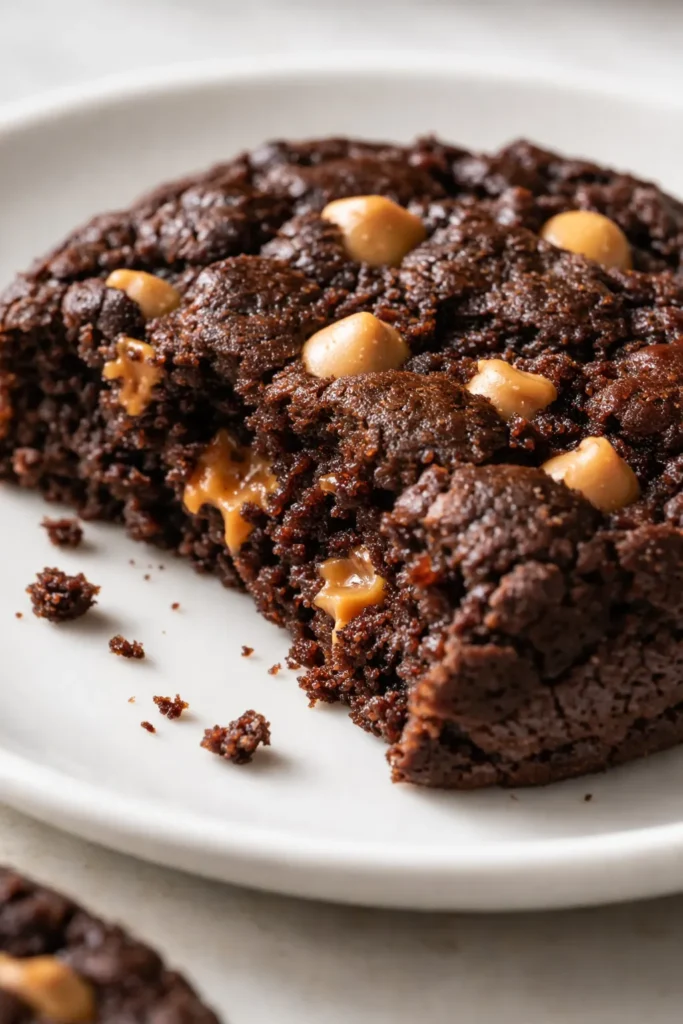
I’ve spent countless hours in the kitchen perfecting my chocolate peanut butter chip cookies. The goal was a thick, fudgy cookie that stays soft for days, with pockets of melty peanut butter in every bite. Here’s what I learned along the way. The first batch I tested with American-style butter spread into thin, greasy discs that crisped at the edges and burned before the center set. The second batch I over-mixed the dough after adding the flour, which developed the gluten and gave me a tough, bread-like crumb. Batch three was the breakthrough: European butter held its structure during creaming, and I mixed the flour in by hand until it just disappeared. The result was a thick, fudgy cookie with a slight chew at the edges that stayed soft for three days. Now I don’t skip the hand‑mixing step, and I always check the butter temperature before I start. This section is about the specifics of those tests – the temperature, the timing, the small adjustments that turned a flat disc into a bakery‑worthy cookie.
Troubleshooting Common Problems
Q: Why did my cookies spread into flat, thin discs?
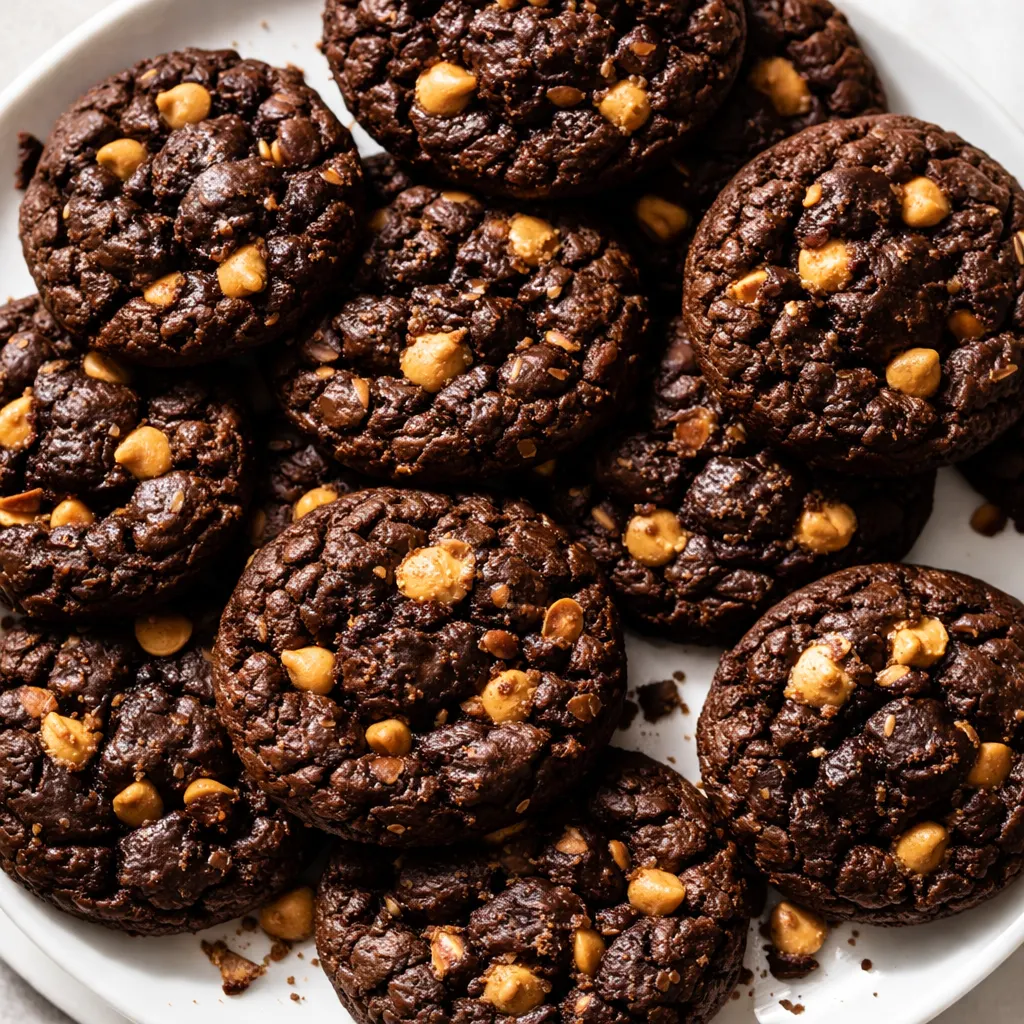
A: This usually means the butter was too warm when you creamed it, or the dough was not chilled before baking. If the butter is mushy, it melts too quickly in the oven, and the cookies spread before they have a chance to set. Fix: Ensure your butter is at a cool room temperature (65‑68°F) and chill the scooped dough for 15 minutes in the fridge before baking.
Q: Can I use Dutch‑process cocoa instead of natural cocoa?
A: You can, but the texture will change. Dutch‑process cocoa is alkalized and won’t react with the baking soda the same way. The cookies will be darker in color, less tender, and will spread more. If you only have Dutch‑process, add ½ teaspoon of white vinegar to the dough to compensate for the missing acidity.
Q: How do I know when the cookies are done?
A: The edges should look set and slightly cracked, and the center should look puffed and just barely set – it will look slightly underdone. A toothpick inserted into the center should come out with a few moist crumbs, not wet batter. If the toothpick is clean, the cookie is overbaked.
Q: Can I make these cookies without a stand mixer?
A: Yes. A hand mixer will work, but the creaming process will take longer – closer to 6–8 minutes instead of 3–4. You’ll need to scrape the bowl frequently to ensure the butter and sugar are fully combined. Alternatively, you can cream the butter and sugar vigorously by hand with a spatula, but this takes a good 10 minutes and a lot of elbow grease.
Why European Butter Is the Difference Between Fudgy and Cakey
American butter contains about 80% butterfat. European butter averages 82‑86% butterfat and has a lower water content. In a cookie, less water means less steam, which means less rise. Less rise translates directly to a denser, fudgier crumb. If you use standard American butter, the extra water reacts with the flour to produce gluten, giving you a cakey texture. The difference is small on paper but enormous in the bite. Many home bakers find that at 350°F, the higher fat content in European butter results in a cookie that holds its shape better and spreads more slowly.
The second mechanism here is the natural cocoa powder. Natural cocoa is acidic, and it reacts with the baking soda to produce carbon dioxide. This gives the cookie a slight lift at the edges while the center stays dense and intensely chocolatey. Dutch-process cocoa is alkalized and won’t react the same way — the cookies will spread more and lack the brownie-like center. According to USDA nutritional data, natural cocoa powder also retains more of its natural antioxidant compounds compared to heavily processed varieties.
The result is a cookie that tastes like a brownie’s fudgy middle, with a chewy edge and pockets of savory-sweet peanut butter chips.
Everything You Need (And a Few Notes From Me)
- 2 cups all-purpose flour (250 grams): Spoon and level it. Scooping compacts the flour and can add 20‑30 extra grams, which will dry out the dough. A kitchen scale is the direct path to consistent results.
- 2/3 cup unsweetened natural cocoa powder (such as Hershey’s): This is not the place for Dutch-process. Natural cocoa’s acidity is what reacts with the baking soda to create the fudgy center. If you only have Dutch-process, see the variation section below.
- 1 teaspoon baking soda: The leavening agent. Make sure it’s fresh — test it by dropping a spoonful into a bowl of vinegar. It should fizz immediately. If it doesn’t, buy new baking soda.
- 1/2 teaspoon kosher salt: Balances the bitterness of the cocoa and the sweetness of the sugars. Use Diamond Crystal if you have it; if using table salt, reduce to 1/4 teaspoon.
- 1 cup unsalted European butter, softened to room temperature (such as Plugrá or Kerrygold): The higher fat content is non-negotiable here for texture. Room temperature means it should bend under slight pressure but not be mushy. If it’s too warm, the cookies will spread into thin discs.
- 3/4 cup light brown sugar, lightly packed: Brown sugar adds moisture and a slight molasses note that deepens the chocolate flavor. Pack it lightly — don’t press it firmly into the cup.
- 3/4 cup granulated sugar: Contributes to the chewy edges and balances the brown sugar’s moisture.
- 2 teaspoons vanilla extract: Enhances the chocolate flavor, even if you can’t taste it directly.
- 2 large eggs: Pull them out of the fridge 30 minutes before you start. Cold eggs will seize the butter and make the dough stiff and hard to work with.
- 2 cups peanut butter chips: Use your favorite brand. Reese’s offers chips that are smaller and distribute more uniformly. If you prefer chunks, roughly chop peanut butter cups and use those instead.
- Peanut butter chips for decorating (optional): Press a few extra chips onto the hot cookies right out of the oven. It makes them look finished and signals to anyone eating them that they’re loaded with chips.
The Setup (It’s Minimal, I Promise)
- Stand mixer with paddle attachment: You can use a handheld mixer, but it will take longer to cream the butter and sugar, and you’ll need to scrape more frequently.
- Sifter or fine mesh sieve: Clumps in cocoa powder are stubborn. Sifting aerates the cocoa and ensures an even distribution.
- Mixing bowls and spatula or wooden spoon: For mixing in the chips by hand.
- Baking sheets and parchment paper: Parchment is non-negotiable here — it prevents the bottoms from over-browning and makes cleanup trivial.
- Thin spatula: A flexible metal spatula is best for lifting the cookies off the sheet without breaking them.
- Wire racks: For cooling the cookies completely, which sets the texture.
- Airtight container: For storage. A container with a tight seal is the only way to keep them soft for multiple days.
Making Chocolate Peanut Butter Chip Cookies: My Exact Process
Start by preheating your oven to 350°F, and line two baking sheets with parchment paper.
- Sift the dry ingredients: In a medium bowl, sift together the flour, cocoa powder, baking soda, and salt. Cocoa powder tends to clump, and sifting is the only way to get it to distribute evenly. Set aside.
- Cream the butter and sugars: In the bowl of a stand mixer fitted with the paddle attachment, beat the softened butter, brown sugar, and granulated sugar on medium speed until light and fluffy, about 3 to 4 minutes. Scrape the sides of the bowl once halfway through. This step is not just about combining — it’s about aerating the butter and dissolving the sugar crystals, which stabilizes the cookie’s structure.
- Add the eggs and vanilla: With the mixer on low speed, beat in the vanilla extract, then add the eggs one at a time, making sure each is fully incorporated before adding the next. Scrape the bowl again. The mixture should look smooth, glossy, and emulsified — not separated or greasy.
- Add the dry ingredients: Gradually add the sifted flour mixture, mixing on low speed until just combined. A few streaks of flour are fine — you don’t want to overwork the dough. Over-mixing develops gluten, which will make the cookies tough.
- Mix in the chips: Remove the bowl from the mixer and fold in the peanut butter chips by hand with a spatula or wooden spoon. This ensures even distribution without over-mixing the dough, and it also helps prevent the chips from sinking to the bottom during baking.
- Scoop and bake: Use a 1.5-tablespoon cookie scoop or a rounded tablespoon to portion the dough into 24 equal pieces. Place them on the lined baking sheets, spacing them about 2 inches apart. Bake for 8 to 12 minutes — the edges should be set and the center should look slightly underdone, puffed and fudgy. For the best texture, do not overbake. The cookies will continue to set as they cool on the hot baking sheet.
- Cool and finish: Let the cookies cool on the baking sheets for 5 to 8 minutes. This step is essential — they are fragile right out of the oven and need time to firm up. Use a thin spatula to transfer them to a wire rack. If you’re adding extra chips on top for decoration, press them in gently while the cookies are still warm. Let cool completely before storing.
How to Prep These Cookies Ahead (And Why I Always Do)
This dough freezes beautifully, which means you can bake fresh cookies in 15 minutes whenever you need them. I portion the dough into scoops, freeze them solid on a baking sheet, and transfer them to a freezer bag. Bake directly from frozen — just add 2 minutes to the baking time. You don’t even need to thaw.
- Fridge: The baked cookies stay soft for up to 3 days in an airtight container at room temperature. Do not refrigerate them — the cold will dry them out.
- Freezer: Freeze the portioned dough for up to 3 months. Bake straight from the freezer. The dough does not need to thaw.
- Reheat: Pop a baked cookie in a 300°F oven for 5 minutes to restore the just-baked texture. The microwave works in a pinch (10 seconds), but it will make the edges slightly chewy.
Things I Learned After Making These 6 Times
- Don’t skip the sift. Cocoa powder is notoriously clumpy. If you skip sifting, you’ll end up with pockets of bitter, dry cocoa in your dough. A fine-mesh sieve takes 30 seconds and fixes the problem entirely.
- Check your butter temperature before you cream. The butter should be 65‑68°F. If it’s too cold, it won’t aerate properly. If it’s too warm (mushy or shiny), the cookies will spread into thin, greasy discs. If your kitchen is warm, cut the butter into cubes and let it sit for 10‑15 minutes — check it by pressing it. It should yield slightly but hold its shape.
- Use a cookie scoop for even sizing. Uniform cookies bake evenly. If you scoop some bigger and some smaller, you’ll end up with burnt edges on the small ones and underdone centers on the large ones. A #40 scoop (about 1.5 tablespoons) is my go-to.
- Underbake them intentionally. The perfect cookie is set at the edges and puffed in the center. When you pull them at 9 minutes, they will look underdone. Let them cool on the pan — the residual heat finishes the bake and locks in the fudgy texture. I’ve never regretted pulling a batch early. I have regretted forgetting to pull them at all.
Easy Swaps That Actually Work
- Dairy-free: Use a high-quality plant-based butter that has at least 80% fat content (Miyoko’s or Country Crock Plant Butter work well). The texture will be slightly less tender, but the fudgy center will still come through.
- Gluten-free: Substitute the all-purpose flour with a 1:1 gluten-free baking flour that contains xanthan gum (like King Arthur Measure for Measure). The cookies will spread a bit more and have a slightly more delicate crumb, but the flavor will be the same.
- Dark chocolate chips instead of peanut butter: If you want a double-chocolate cookie, use dark chocolate chips (60‑70% cacao) instead of peanut butter chips. The bitterness of the dark chocolate cuts through the sweetness of the dough nicely.
- Spiced chocolate version: Add 1 teaspoon of cinnamon and ¼ teaspoon of cayenne pepper to the dry ingredients. The warmth of the spices complements the chocolate and gives the cookie a more mature flavor.
- Substituting other chips: You can easily swap the peanut butter chips for butterscotch, white chocolate, or mint chocolate chips. Keep the volume the same — 2 cups — to maintain the dough’s structure.
How Do I Store These Cookies to Keep Them Soft?
Q: How long do these cookies last, and how should I store them?
A: They stay soft for up to 3 days at room temperature. Store them in an airtight container with a slice of bread if you live in a dry climate — the bread releases moisture and the cookies absorb it, keeping them fudgy for longer. Do not store them in the fridge, as the cold air dries them out.
Q: Can I freeze the baked cookies?
A: Yes. Let them cool completely, then layer them between sheets of wax paper in a freezer bag. They freeze well for up to 3 months. Thaw at room temperature for 10 minutes, or warm them in a 300°F oven for 5 minutes.
Q: What’s the best way to reheat a cookie?
A: A 300°F oven for 5 minutes restores the warm, just-baked texture. The microwave works for 10 seconds if you’re impatient, but the edges will soften and lose their chew.
Q: What do you serve with these cookies?
A: A cold glass of whole milk is the classic pairing — the fat and protein cut through the sweetness of the cookie. For a richer option, serve them warm with a scoop of vanilla bean ice cream. If you’re feeling decadent, sandwich two cookies with a thin layer of chocolate ganache or peanut butter buttercream.
The difference between a good chocolate peanut butter chip cookie and a great one is exactly three things: the fat content of your butter, the type of cocoa you use, and the discipline to pull them from the oven before they look done. Master those three, and you’ll never reach for a box of chocolate mix again.
If you make these, let me know how they turn out — drop a comment below or tag me on Pinterest. I love seeing the variations you come up with.
📌 Chocolate Peanut Butter Chip Cookies recipe that stays fudgy for 3 days — save it for your next cookie swap or weekend baking project.